

Blog
45 Degree Chamfer Bit: Woodworking Operation & Practical Applications

A 45 degree chamfer bit is a widely used router cutter designed to create crisp angled edges on wood workpieces. This bearing-guided tool removes sharp edges and builds decorative bevelled surfaces for furniture and wood trim projects. This guide covers tool specifications, key benefits and step-by-step operating procedures. It also covers safety rules and troubleshooting, so you achieve consistent, clean bevel results.
Basic Tool Information
Tool Specifications & Core Function
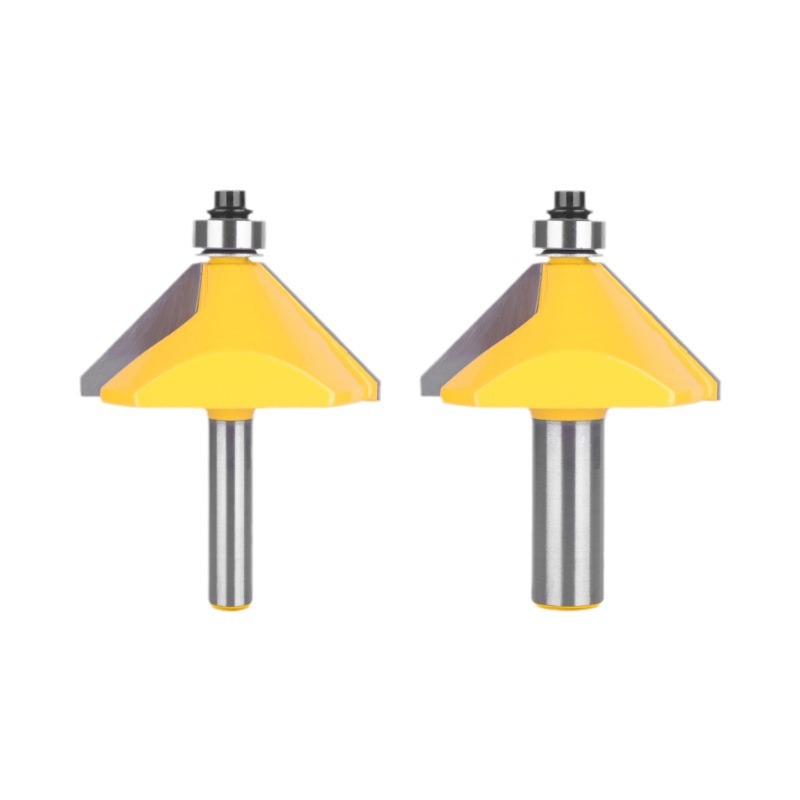
This is a 45° bearing-guided chamfer bit built for wood routers. The 1¼ inch diameter ranks as the most popular size within standard bit sets.
Its primary function is cutting 45° angled chamfers along workpiece edges. These cuts serve two main purposes: eliminating sharp edges and forming decorative sloped profiles.
Common applications include edge chamfering for table legs, aprons and tabletop components. Woodworkers also rely on this bit to shape custom visual detailing for finished pieces.
A major operational benefit comes from the built-in guide bearing. You can complete routing passes without a separate fence. Better still, you adjust chamfer depth easily by raising or lowering the cutter.
Core Advantages
Consistent, fast cuts separate this router bit from manual hand tools. Compared with hand planes, a 45 degree chamfer bit produces uniform bevels on table legs, aprons and tabletops in far less time.
Simplified handling lowers the learning barrier for new operators. The bearing mounted at the bit base delivers automatic edge guidance, so no extra fence is required during cutting.
Flexible depth tuning also supports diverse design requirements. That is why the 45 degree chamfer bit suits both one-off pieces and repeat work. Simply adjust the cutter height to increase or decrease chamfer size for your project.
Thoughtful chamfer placement transforms how viewers perceive workpiece thickness. Bevel the bottom edge of thick boards, and you create a lighter visual appearance. Chamfer the top edge of thin stock instead, and the piece gains a substantial look.
Beyond aesthetics, chamfering softens sharp corners. This modification improves furniture safety while boosting the finished visual appeal of your woodwork.
Standard Operating Workflow
Step 1 – Pre-Job Preparation
Verify that your workpiece has finished rough machining, with no prominent burrs or cracks along the target edge.
Mount the 45 degree chamfer bit into your wood router, whether you use a handheld unit or a router table. Then double-check the collet to confirm tight, secure installation.
Put on protective gear, including safety goggles, a dust mask and hearing protection, before starting the router.
Set your initial bit height so the cutter lightly touches the workpiece edge. After that, raise the bit incrementally to reach your target chamfer dimension.
Step 2 – Chamfer Routing Operation
Start the router and wait until the spindle reaches full stable speed. Rest the bearing on the workpiece edge that you plan to machine.
Move the router smoothly along the board perimeter. Maintain steady bearing contact against the edge at all times, because that contact preserves uniform chamfer geometry.
Should you need a deeper chamfer, power down the router and adjust the bit height. Repeat routing passes until you hit your target depth.
Use top or bottom edge chamfering techniques whenever you want to manipulate the visual style of your workpiece.
Step 3 – Final Inspection
Switch off the router and wait fully for the bit to stop spinning before removing your workpiece.
Examine the chamfer angle, cutting depth and surface finish. Look out for chipped edges or unwanted steps along the profile, then clear away accumulated sawdust and store the bit properly.
Important Operational Guidelines
- Always adjust chamfer depth by raising the cutter height. Never force the router downward into the wood to increase cut depth.
- Reduce feed speed when machining hardwood. This adjustment prevents cutter overload and minimises the risk of edge chipping.
- Keep the router perpendicular to the workpiece surface throughout the cut, because tilting the tool shifts the chamfer angle. In short, let the 45 degree chamfer bit do the cutting, and never press it into the wood.
- Never run the router without the required personal safety equipment.
Where Bevel Router Bits Fit in Your Kit
Chamfer bits belong to the wider family of bevel router bits, and that family solves more than one workshop problem. A chamfer bit carries a guide bearing for edge work, while many bevel router bits run without a bearing and cut angled shoulders, mitres or splicing profiles on a router table.
Choose by edge condition first. For free edges on panels, legs and aprons, the bearing-guided chamfer bit is faster and safer, because the bearing sets the cut width automatically. For joinery such as mitre folds, panel splicing or glue-ready bevels, a dedicated bevel router bit gives you an accurate angle right across the cut.
Both types benefit from the same habits: sharp carbide, correct height setting and a steady feed. When you need a bevelled edge that must also glue up cleanly, our 45 degree bevel carbide router bit covers splicing and edge trimming in one cutter.
Common Issues & Troubleshooting
| Symptom | Possible Causes | Solutions |
|---|---|---|
| Inconsistent chamfer depth | Unsteady router movement; loosely secured bit | Guide the router at a smooth constant pace; retighten the router bit firmly |
| Chipped wood edges | Excessively fast feed rate; dull cutting edges | Slow down your feed movement; replace with a sharp router bit |
| Shifted chamfer angle | Tilted router; poor bearing contact with edge | Hold the router perfectly vertical; ensure the bearing stays pressed against the workpiece edge |
Key Takeaways
The bearing-guided design removes the need for a fence. Bit height controls chamfer depth, and chamfer placement on top or bottom edges alters the visual perception of material thickness. Those two controls make the 45 degree chamfer bit one of the most forgiving cutters in the kit.
Simple operating rules make this tool easy to master. Secure the bit and wear safety gear before starting your cut. Keep the bearing riding the edge while moving at a constant speed, raise the bit to adjust chamfer depth, and choose top or bottom bevel placement to create visual thickness effects.
FAQ
Can a 45 degree chamfer bit work on both handheld routers and router tables?
Yes. The built-in guide bearing supports both router styles, although router tables often yield smoother and more repeatable chamfer results for longer workpieces.
How do I get a deeper 45° chamfer without tearing wood?
Make multiple incremental passes. Raise the bit slightly for each new cut instead of attempting one deep single pass, which commonly causes edge breakout.
What material types suit a 45° chamfer bit?
This bearing-guided chamfer bit works well across most hardwood, softwood and plywood panels. Remember to slow your feed speed when routing dense hardwood stock.
Do I need a separate bevel router bit for splicing work?
Yes, for glue-ready results. A chamfer bit shapes visible edges, while bevel router bits cut the accurate angled faces that splicing and mitre work require. For panel splicing, review our carbide bevel router bit for splicing and edge trimming.