

Blog
Wood Router Bit Safety & Maintenance Guide for Woodworkers

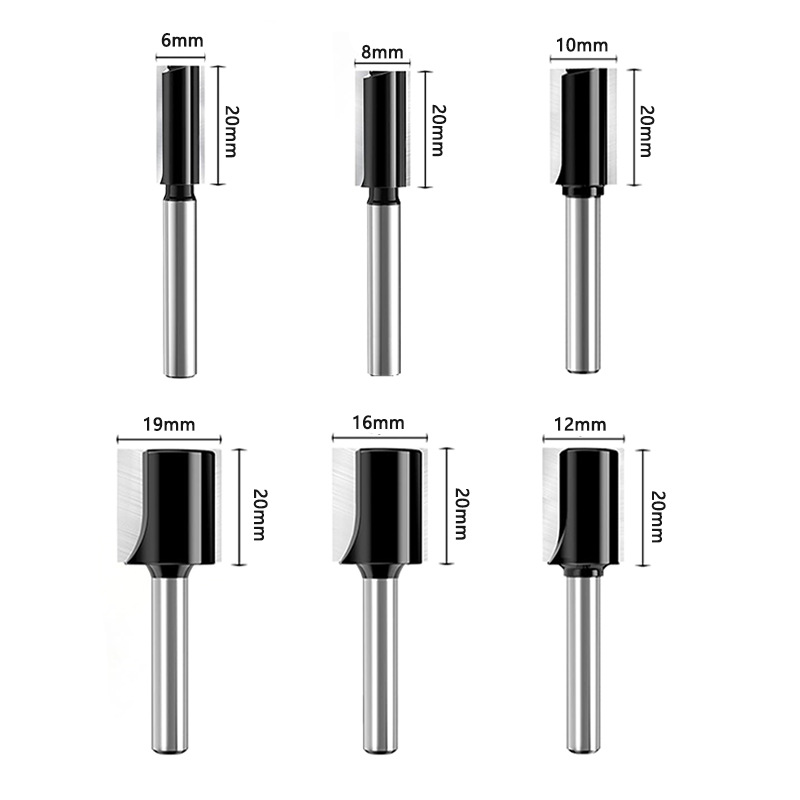
Wood router bit safety and routine maintenance decide whether a cutter delivers clean, precise cuts or causes accidents and premature tool failure. carbide router bits are precision cutting tools, yet safe operation and regular care are often overlooked by hobbyists and professional fabricators alike. This complete guide covers router bit construction, step-by-step installation, critical operating safety rules and proven long-term maintenance routines. Every core parameter and safety requirement is outlined to help woodworkers prevent tool breakage, workpiece damage and personal injury while maximizing cutting performance and service life. It serves as an essential on-site manual for CNC routers, table-mounted routers and handheld routing equipment.
1. Router Bit Construction & Application Scope
Every wood router bit is manufactured to pair with wood routers and create custom cuts or decorative profiles. The shank and tool body, which supports the carbide cutting edges, are constructed from 45# steel, while the cutting edges themselves are fully made of carbide.
Understanding how the tool is built is the first step in wood router bit safety, because the right bit must match both your machine and your workpiece material. This series of router bits works with nearly all common workpiece materials, including hardwood, softwood, plywood and composite wood panels. They are compatible with CNC wood routers, table-mounted routers and handheld wood routers. Always refer to the dedicated product page of your selected router bit to confirm its exact working limits before starting any machining job.
2. Router Bit Installation Precautions
Proper installation forms the foundation of safe, stable routing. Even high-quality router bits will vibrate, slip or fail prematurely when clamped incorrectly. Follow these rules strictly during setup:
- Always read and follow the official user manual of your power router tool before mounting or removing any cutter.
- Match your router bit to the workpiece material. Evaluate material density and hardness, and adhere strictly to the spindle speed and feed rates recommended by the bit manufacturer.
- Never install or operate dull, chipped or cracked router bits. Inspect cutting edges routinely, and replace damaged cutters right away to preserve cutting accuracy and reduce safety hazards. Only work with fully sharpened router bits.
- Unplug the router power cord completely whenever you replace bits, adjust cutting depth or reposition guards.
- Wipe dirt, resin and debris off the bit shank, and examine the condition of your collet. Confirm the collet is fully opened and its nut loosened before inserting the router bit.
- Fully seat the shank into the collet, then pull the bit back roughly 1/16 inch (1.59 mm). Do not push the shank all the way to the bottom of the collet; leave a minimum clearance of 1/8 inch (3.18 mm). Check your power tool manual for exact dimension requirements. Partial shank insertion is not permitted. Tighten the collet securely and recheck the assembly periodically. This practice prevents bit slippage and unwanted runout caused by wear. Keep the collet clean at all times, swap out worn collets immediately, and fully fasten the collet nut using the correct wrenches.
- Avoid fitting large-diameter router bits onto handheld routers.
- For any router bit with a diameter larger than 1-1/4 inches (31.8 mm), use it on CNC machinery whenever possible to boost operational safety.
3. Critical Operating Safety Rules
Once your router bit is securely mounted, follow these operational guidelines to avoid accidents and machining defects:
- Cut off the power supply before making adjustments or swapping cutters.
- Inspect your workpiece thoroughly before machining. Remove warped or twisted sections, and extract embedded nails, screws, staples, grit or other foreign objects that can chip carbide edges.
- Wear safety goggles and hearing protection during routing work. Keep loose sleeves, gloves and hanging clothing far away from the rotating cutting zone.
- Do not let the cutting edge touch the workpiece as you start up the router. Allow the tool to reach its full operating speed before bringing it into contact with the material.
- Double-check that the router bit sits firmly within the collet and that the router base is locked securely.
- Schedule regular inspections to identify wear on the router collet.
- Maintain a safe distance; always keep your hands clear of the rotating router bit.
- Never exceed the maximum recommended RPM rating printed for your router bit.
- Avoid climb milling at all times. Feed the workpiece against the rotation direction of the router bit for stable, predictable cuts.
- Never force the router bit through material or overload your router motor. Maintain a consistent, steady feed rate to prevent burning the wood surface.
- Follow the correct movement direction for different cutting types. Move the router counterclockwise for external profile cuts, and guide it clockwise for internal cavity cuts.
- Route end grain sections first when working on timber with exposed end grain.
- Tune spindle speed according to your wood species to reduce burning and edge chipping. Remember that larger-diameter router bits require lower RPM settings. Complete deep cuts through multiple shallow passes instead of forcing the bit into the material in one single plunge. If your router shows obvious signs of overload, this usually means your cutting depth is too aggressive or the cutting edges have turned dull.
4. Router Bit Maintenance & Care Practices
Good wood router bit safety depends as much on care as on correct operation. Consistent, thoughtful maintenance preserves sharp cutting edges, extends tool lifespan and maintains clean, precise cuts over repeated use. Integrate these simple practices into your woodworking workflow:
- Clean router bits after every use. This routine removes accumulated wood resin and adhesive residue. You can use paint remover or oven cleaner alongside an old soft toothbrush to gently scrub away stubborn buildup.
- Inspect cutting edges regularly. Watch for nicks, chipping and dullness. Repair or replace damaged router bits to sustain reliable cutting quality.
- Handle carbide router bits carefully. Dropping or rough handling can easily chip the brittle carbide cutting edges or dull the profile.
- Optimize your cutting parameters for each job. Adjust spindle speed and feed rate to suit your workpiece material, reducing excess heat that accelerates premature tool wear.
- Set up your router with precision. Take accurate measurements and align your fence properly to lower overall cutting load on the router bit.
- Store router bits in a clean, dry location away from high humidity. Use protective bit cases or dedicated tool racks to prevent damage during storage.
- Carry out routine inspections even for router bits that are not currently in use. Preventative checks help catch potential problems early and improve long-term tool reliability.
- Seek professional resharpening services when your bits grow dull. Restoring the precise geometric profile of carbide router bits requires specialized grinding equipment and professional expertise.
Building these habits around your woodworking router bits is the simplest way to protect your investment and keep every cut clean.
Wood Router Bit Safety & Maintenance Checklist
Use this quick checklist before and after every routing session to keep wood router bit safety on track:
- Unplug the router before any bit change or depth adjustment.
- Inspect the collet and shank, and confirm correct shank clearance.
- Verify RPM limits and feed rates for your material.
- Wear eye and ear protection; clear the cutting zone of loose clothing.
- Clean resin off cutters after use and store them dry.
- Resharpen or replace dull bits before the next job.
FAQ
Q1: Why should I pull the shank back slightly after fully inserting a router bit into the collet?
A1: Leaving a small gap prevents the shank from bottoming out inside the collet. Without this space, the collet cannot clamp evenly, which creates runout, bit wobble and a higher risk of the cutter slipping during high-speed rotation.
Q2: Can I use large diameter router bits on a handheld wood router?
A2: It is strongly discouraged. Large cutters generate higher cutting forces and vibration. Bits over 1-1/4 inches in diameter are recommended for CNC routers for better stability and operator safety.
Q3: What causes wood burning during routing?
A3: Common triggers include excessive spindle speed, too slow feed rate, dull cutting edges or overly deep single-pass cuts. Adjust RPM, increase feed speed, use multiple shallow passes or replace worn bits to solve burning issues.
Q4: How should I clean hardened resin off carbide router bits?
A4: Use paint remover or oven cleaner to dissolve resin buildup, then gently scrub the cutter with a soft toothbrush. Avoid abrasive scouring pads that scratch and damage carbide cutting edges.
Q5: What direction should I move the router for internal and external cuts?
A5: Push the router counterclockwise for outer edge profiling. For internal cavity cuts inside a workpiece, move the router clockwise. Always feed opposite to the bit rotation and avoid climb milling.
Related Posts
Reasonable Selection of Solid Carbide Helical Wood Router Bits: Types, Comparison and Machining Guidelines
Learn how to select a solid carbide helical wood router bit: compare helical vs straight, left/right/composite helix, entry methods, parameters and wear tips.